Before and after retinol photos are everywhere, but most leave out the details that determine whether your own skin improves: the product strength, starting schedule, sunscreen habits, and how long the person actually tested it. After 12 years working with clients in spas and dermatology clinics, I have learned to look for measurable changes rather than dramatic promises. Retinol can be useful, but it is not a three-night transformation.
What retinol actually does
Retinol is a vitamin A derivative used in over-the-counter skincare. Your skin converts it into retinoic acid, the form that interacts with skin cells. That conversion is why retinol is generally gentler than prescription tretinoin, but it also means results take time. The ingredient can encourage more regular shedding at the surface and support collagen-related processes deeper in the skin.
In practical terms, people usually reach for retinol because they want smoother texture, softer-looking fine lines, fewer clogged pores, or a more even appearance. It is not a magic eraser, and it will not permanently remove every mark or wrinkle. The best before and after retinol comparisons show gradual improvement in texture and consistency, not a completely different face.
A product label can make comparison difficult. Retinol percentage is not always disclosed, and formulas vary in stability, packaging, and supporting ingredients. A 0.3 percent lotion with glycerin and ceramides may be easier to use consistently than a stronger serum that leaves your skin peeling.

A realistic before and after retinol timeline
During the first two weeks, the most noticeable change may be dryness, tightness, or a little flaking. That does not mean the product is working better. It means your skin is adjusting, and excessive irritation is a reason to reduce frequency. Start with a pea-sized amount for the entire face once or twice weekly, applied to completely dry skin.
Around weeks three through six, some people notice smoother makeup application or fewer rough patches. Congestion can appear to shift as cell turnover changes, although persistent breakouts deserve professional guidance rather than an increasingly aggressive routine. This is the stage where many people quit because the mirror does not yet show a dramatic difference.
At roughly eight to twelve weeks, a consistent user may see more even texture and a fresher overall appearance. Fine lines usually require longer observation. Take photos in the same room, with the same lighting, camera distance, and facial expression. Otherwise, you are comparing lighting rather than skin.
Before and after retinol images taken six months apart can be useful, but they still cannot prove that retinol caused every change. Sleep, seasonal humidity, sunscreen, hydration, other products, and natural fluctuations all matter.
How to start without overdoing it
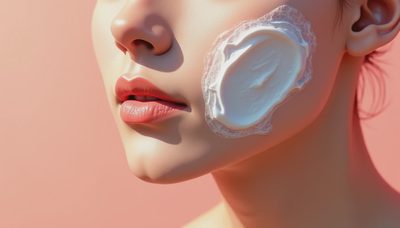
Use a gentle cleanser, let your face dry, then apply a pea-sized amount of retinol. Dot it across the forehead, cheeks, and chin before spreading a thin layer. Keep it away from the corners of the nose, lips, and eyelids at first; those areas often become irritated first. Follow with a plain moisturizer.
A sandwich method can help sensitive skin: moisturizer first, retinol second, moisturizer again. It slightly cushions the application without making the ingredient useless. Use retinol at night, and wear broad-spectrum sunscreen during the day. Sun exposure can worsen the appearance of the same discoloration and fine lines you are trying to improve.
Do not begin retinol on the same night as exfoliating acids, benzoyl peroxide, or a strong vitamin C product unless you already know your skin tolerates that combination. Alternating nights creates a clearer test. If burning, swelling, or persistent redness develops, stop and seek medical advice. Retinoids are generally avoided during pregnancy, so ask a qualified clinician about appropriate alternatives.
Reading a retinol label like an esthetician
Look first at the packaging. An opaque, air-restrictive pump is usually preferable to a clear jar because light and repeated air exposure can affect formula stability. Next, scan for supporting ingredients such as glycerin, squalane, dimethicone, niacinamide, or ceramides. These do not make retinol stronger, but they can make regular use more comfortable.
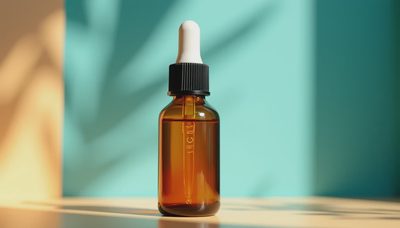
The cheapest bottle is not automatically the best value. I have seen a $22 drugstore lotion last nearly four months because the formula required only a small amount, while a $68 dropper serum ran out in eight weeks. That works out to about $5.50 per month versus $34 per month. Cost per ounce is helpful, but cost per usable month is often more honest.
Before and after retinol results are easier to achieve with a product you will actually use. If your skin is dry, choose a cream or lotion. If you are prone to congestion, a lighter serum may feel better, but do not confuse a quick-drying finish with superior performance.

Common mistakes that distort results
The first mistake is applying too much. More product does not create proportionally faster improvement; it usually creates more irritation. A pea-sized amount is enough for the face. The second is changing several products at once. If you add retinol, a new exfoliant, and a brightening serum in the same week, you cannot identify what helped or caused discomfort.
Another mistake is judging the product after one week or expecting every mark to fade. Pigment can be stubborn, and deeper lines will not disappear from a cosmetic cream. Before and after retinol photos should be taken monthly, not daily, because daily checking magnifies normal changes in hydration.
Skipping sunscreen is also a problem. Retinol does not replace sun protection, and morning sunscreen is one of the most practical ways to protect your progress. Choose SPF 30 or higher and reapply when spending extended time outdoors.
My simple eight-week testing plan
For the first two weeks, use retinol once weekly and focus on moisturizer and sunscreen. If your skin remains comfortable, use it twice weekly during weeks three and four. During weeks five through eight, continue twice weekly or move to every other night only if there is no ongoing irritation.
Take a baseline photo before the first application. Record the product, amount, frequency, and any reactions in your phone. At the end of week four, look for texture and comfort rather than perfection. At week eight, compare the photos side by side. If the skin is calmer and smoother, continue. If it is persistently red, painful, or peeling, the routine needs adjusting.
This approach makes before and after retinol testing less emotional and more useful. You are evaluating a routine, not chasing a social media reveal.
The honest takeaway
Retinol can earn a place in a routine when expectations are realistic and the formula is used consistently. The strongest evidence in your own bathroom will be a series of controlled photos, a comfortable schedule, and a product that fits your budget well enough to replace.
Before and after retinol comparisons are most convincing when they show ordinary lighting, months rather than days, and the full routine behind the result. Start low, go slowly, protect your skin in the morning, and do not spend $90 when a $25 formula meets your needs. Learn the label, then choose.
No letters yet — be the first to write.